 I started out by stamping the image with black versafine onto white cardstock, then watercolored around the hands themselves to really make them pop. I then matted that image with dark gray, and accented it with a black prima flower and a metal word embellishment (K&Co). I didn't want to mount it onto a stark white card, so I pulled out my handy dandy glimmer screen, and misted over it with silver glimmer mist - it's a perfect way to add interest but not detract from the focal image. I also added some black twill to balance the "blackness" from the flower. It went together pretty quickly, and I love the result!
Saturday, July 26, 2008
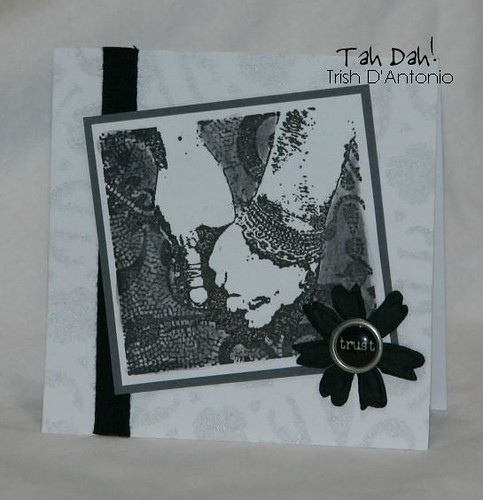
Trust
I love the image in Hands Collage - I think it captures the essence of friendship... and what better word is there for that than trust?
I started out by stamping the image with black versafine onto white cardstock, then watercolored around the hands themselves to really make them pop. I then matted that image with dark gray, and accented it with a black prima flower and a metal word embellishment (K&Co). I didn't want to mount it onto a stark white card, so I pulled out my handy dandy glimmer screen, and misted over it with silver glimmer mist - it's a perfect way to add interest but not detract from the focal image. I also added some black twill to balance the "blackness" from the flower. It went together pretty quickly, and I love the result!
I started out by stamping the image with black versafine onto white cardstock, then watercolored around the hands themselves to really make them pop. I then matted that image with dark gray, and accented it with a black prima flower and a metal word embellishment (K&Co). I didn't want to mount it onto a stark white card, so I pulled out my handy dandy glimmer screen, and misted over it with silver glimmer mist - it's a perfect way to add interest but not detract from the focal image. I also added some black twill to balance the "blackness" from the flower. It went together pretty quickly, and I love the result!

Friday, July 25, 2008
Funky Mugs & Blue Daisies
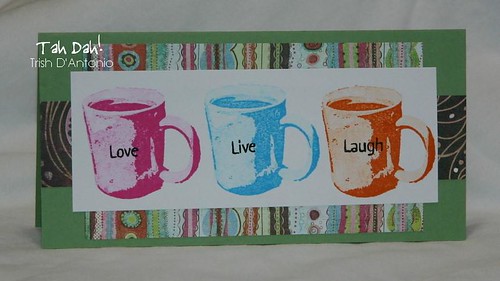 So how's this for bright? I wanted to do some sort of line-up with the mugs, and this is what I came up with. I drew the colors from the paper (BasicGrey Phoebe), and while they're definitely not my "norm" I think they're kinda fun. The words on each mug are from the Middie Messages #2 set, and I used a marker to ink the words up individually. I must say that this card would not have been possible without the stamp-a-ma-jig; I used it for each mug as well as the words. I'm still marveling the fact that Sarah Kornhaus was able to create this gorgeous card without the SAMJ!
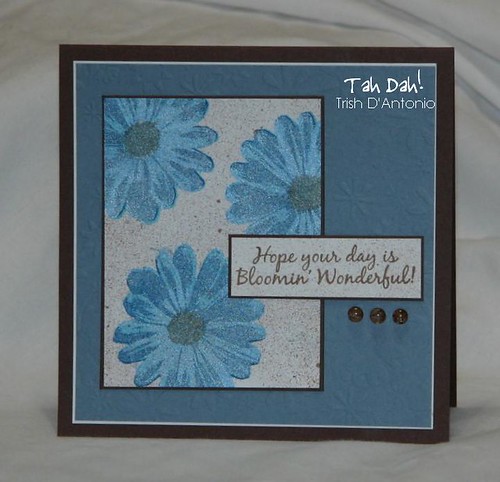
This is another card that I needed the SAMJ on - the daisies are gorgeous, but it's really important to line them up properly. I made the daisies by first stamping the second layer image with palette cote d'azur, and then the 3rd layer with palette beaux arts blue. I wasn't happy with the result, though, so overstamped with the solid (generally the 1st layer) using brilliance pearlescent sky blue. Much better! I then added the centers (versafine sepia) and misted the panel with some denim blue & coffee shop glimmer mists. I then stamped the sentiment (Bloomin') and gave that panel the same glimmery treatment. I embossed the blue panel (Ellison daisies emb plate) and added a few dew drops for a bit more dimension.
Wednesday, July 23, 2008
Sketch Creations
Both these cards are based on the sketch over at LilyBean's Paperie, but that's where the similarities end!
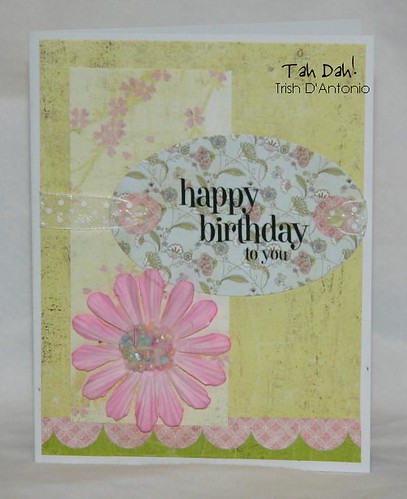
This first card is definitely "scrappy" - all patterned papers and not a single stamp in sight. It was fun to make, and I know my niece will love it! The sentiment is a rub-on from American Crafts, and the papers are all BasicGrey LilyKate. I created the scalloped edge along the bottom with SU's slot punch, and piled seed beads on to the center of the prima flower (adhered with matte accents from Ranger)

The second card is all about stamping and I challenged myself to use only cardstock. I did have to reverse the order of the main panel and oval accent, but otherwise left it alone. I pulled out some floral smARTworks' sets, and chose to use Rose Trio #3 and Stem Duo. I stamped the flower using versamagic wheat and thatched straw, then palette sunflower as the final color; the leaves were stamped with versamagic tea leaves, and I used vm sahara sand for the sentiment. I split the sentiment using the stamp-a-ma-jig, and then cut it out using an old sizzix die.As I palyed with all the elements, the flower was looking rather stark, so I chalked around the image, and was very pleased with the outcome. I pulled out some crocheted looking lace from my stash, and it finished off the card beautifully. I love how all the muted tones came together on this one!
Tuesday, July 22, 2008
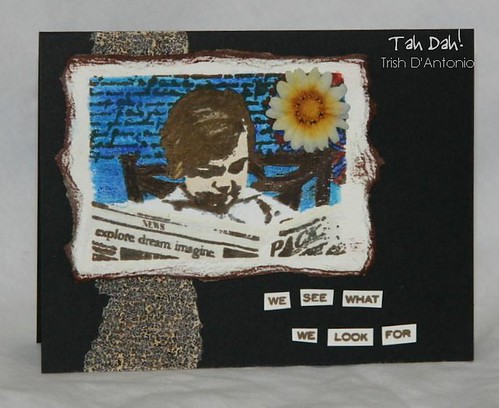
Looking
 I can't believe it's been over a week since I last posted! Life has definitely been a bit crazy around here, and while I have done some stamping I just haven't managed to post anything...
Both cards I'm sharing today use Looking collage. This first one is much darker than what I normally do, but I decided to mix it up a bit. I wasn't happy with the way the swirly in the upper right corner turned out, but a little resin sunflower from my stash (I'm guessing it's K&Co) took care of that issue. I layered it with a strip of sandpaper - definitely an unexpected element - and then pieced together a shortened version of the sentiment.
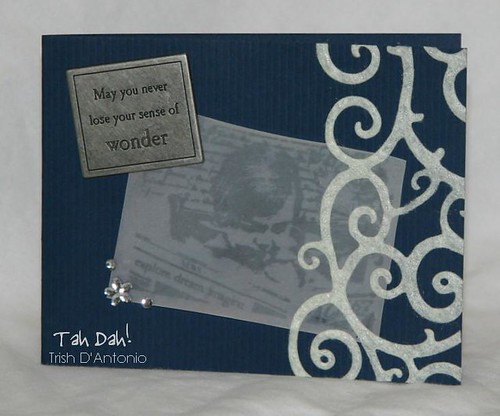
This second card could be subtitled "Ways to attach vellum." I started out by stamping the image onto some heavyweight vellum, didn't like how it looked, but then when I swiped it with a baby wipe I loved the soft image that was left behind. I decided to layer it onto a navy card base, then added the metal square that reads, "May you never lose your sense of wonder" (Making Memories) I then added the self-adhesive felt edging (Queen & Co), then the little rhinestones (Rob & Bob) as a final touch.
Well, that's all I have time for! Hopefully I won't disappear for an entire week this time :)
Sunday, July 13, 2008
Ooh La La
 I managed to squeeze in some stamping time this evening; when I saw the mojo sketch earlier this week, I knew I wanted to make something using smARTworks' Ooh La La set, and I'm delighted with the final result. I paired the lady up with some 7gypsies paper, a Martha Stewart punch, and a few tiny pink pearls as the final touch.
Ooh la la is right! :)
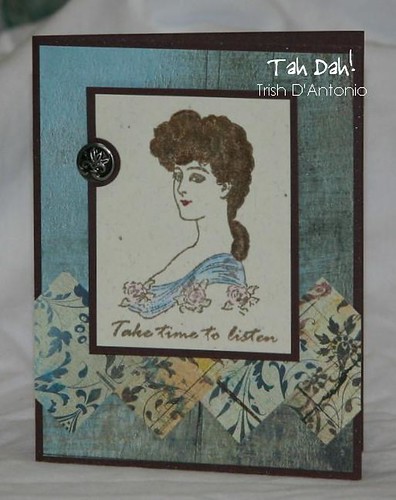
Since I had everything out, I went ahead and made another card. I inked up the second lady so she wouldn't get jealous, then added some color with my prismacolor pencils. I only used part of the sentiment; the full one reads "Take time to listen to the melody of life." I coordinated the image with some BasicGrey paper from my stash; after playing around with it for way too long, I finally chose to do the a layer of diamonds. I used the SU slit punch on the mat, then added a fancy schmancy brad.
Well, time to get off the chair and get moving - I hope to be back to share more this week!
Thursday, July 10, 2008
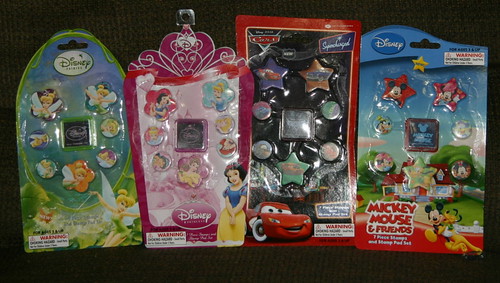
Kids Stamps
I know I've been unusually quiet for these past couple weeks - we're trying to get a number of things taken care of on the home front. But I *DID* want to share my exciting find from Dollar Tree with people who would understand my excitement:
Tuesday, July 8, 2008
Fun with Crafty Secrets
Vicki Chrisman (my glimmer mist idol!!) recently hosted a little challenge: she sent out packets with misc bits & pieces from the Crafty Secrets Heartwarming Vintage collection and each recipient was to make at least one card. Well, I was lucky enough to participate, and now it's time to unveil the creations :)

Neither creation has any stamping on it - definitely unusual for me. The CS images were absolutely adorable, though, and I just didn't think anything else was needed.
This first card features a kewpie image - I had to laugh when I saw this in my package because I am sooooo not a gardener! Regardless, it was cute and lots of fun to work with. I cut it out with my Fiskars "stamp" edged scissors, then added the cute prima. I layered a bit of lace onto Bazzill bling, then added the buttons. Super simple!
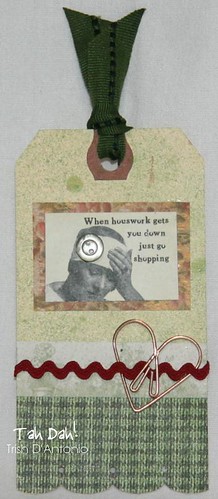
We only needed to make one item, but I was dying to use this lady! It was too small for a standard card, though, so I pulled out a manila shipping tag to use as the base. I started by hitting it with a bit of glimmer mist - no pattern, but a nice layer of sparkley color. I then layered the houdstooth paper across the bottom and punched the edge with a Martha Stewart scallop punch. The little strip above that was from the page with the kewpie, and I added the rickrack and adorable copper heart clip. I matted the central image with some floral paper (had to get a bit more red in there somewhere!) and accented her aching head with a button. I looped the green trim through the top, and it's now hanging above my workspace. It may not be good economic advice, but it makes me smile every time!
Anyway, be sure to head over to This Art That Makes Me Happy to see what the other ladies have done. It's a veritable plethora of crafty inspiration!
Neither creation has any stamping on it - definitely unusual for me. The CS images were absolutely adorable, though, and I just didn't think anything else was needed.
This first card features a kewpie image - I had to laugh when I saw this in my package because I am sooooo not a gardener! Regardless, it was cute and lots of fun to work with. I cut it out with my Fiskars "stamp" edged scissors, then added the cute prima. I layered a bit of lace onto Bazzill bling, then added the buttons. Super simple!
We only needed to make one item, but I was dying to use this lady! It was too small for a standard card, though, so I pulled out a manila shipping tag to use as the base. I started by hitting it with a bit of glimmer mist - no pattern, but a nice layer of sparkley color. I then layered the houdstooth paper across the bottom and punched the edge with a Martha Stewart scallop punch. The little strip above that was from the page with the kewpie, and I added the rickrack and adorable copper heart clip. I matted the central image with some floral paper (had to get a bit more red in there somewhere!) and accented her aching head with a button. I looped the green trim through the top, and it's now hanging above my workspace. It may not be good economic advice, but it makes me smile every time!
Anyway, be sure to head over to This Art That Makes Me Happy to see what the other ladies have done. It's a veritable plethora of crafty inspiration!
Tuesday, July 1, 2008
Birthday Flower
 Well, it's Tuesday and time for another sketch from Mercy! For today's card, I used the Daisy Trio #2 set and versamagic inks (1st layer: wheat, 2nd: sage & thatched straw, 3rd: tea leaves, persimmon & pink grapefruit). The sentiment is from Cake Time. I used apricot cardstock for the base, but it'sbeen lightly spritzed with bronze blimmer mist so there's a nice sheen IRL. The finishing touch was a few Dew Drops (adhered with glue dots).
I used DCWV papers for the card because I liked the bright, summery colors, but originally I was
 planning to go with the more muted tones of BasicGrey Perhaps paper - what a difference! I know things aren't straight on here - I just laid the pieces down for a quick pic
That's all for this afternoon; I am working on a few other projects right now, but not sure when I'll get them finished up and posted. I ended up hurting my foot this weekend - thankfully nothing severe, but it's definitely slowing me down. Later!
Subscribe to:
Comments (Atom)