Monday, December 22, 2008

Nephew's Birthday Card

My nephew will be turning 3 on Christmas Eve, and we attended his party this weekend. I pulled out one of my favorite paper pads, made by Making Memories, and this went together very quickly. For the left panel, I repeatedly stamped the happy block (Technique Tuesday) over the striped paper. On the diamond side, I stamped the 3 (foam Making Memories stamp - does anyone else still use those?) with white acrylic paint, and added the sentiment (Melissa Frances). Final touch was a bit of fuzzy yarn to add some dimension.

Well, this will probably be the last you hear from me until after Christmas. Just too many other things needing my attention. May you all have a blessed holiday!

Wednesday, December 17, 2008

Late to the Party!

I'm definitely running behind today; it's time for the smART Cookie Tea Party, and I'm just now arriving (blush, blush).

Our hostess Peggy challenged us to mount our focal image in an oval. Things are quite busy around here with Christmas looming on the horizon, so I kept my card pretty simple. All the images are from the "Purpose Small" set. I stamped the main image onto some pale bluish lavendar cardstock, then die cut it and matted with a black die cut. I knew I wanted to accent it with ribbon, but the white card base needed something more, so I pulled out my box of glimmer screens and grabbed some glimmer mist to create a soft, shimmery design along the bottom. Stamped the phrase, and good to go! It's definitely not a Christmas card, but I can't help but think of how timely the sentiment is... how that baby born so long ago truly can heal.

Be sure to check out the oval-riffic stuff that Susan (also sharing Peggy's card), Dina, Giovana & Donelda have created.

Monday, December 15, 2008

JOY!


Time for another cookie challenge! This time we were each given the Candle Joy set - a very cute set full of possibilities! I made a gift card holder; I seem to be giving more and more gift cards away these days, and this is one way to give them a bit more personality. For this one, I cut the cardstock to 4 1/4" x 10", then scored at 1 1/2" and 5 3/4". I stamped the little holly image on the inside pocket just to dress it up a bit. The sentiment was stamped and embossed, then I stamped the candle image onto plain white cardstock. It was painted with twinkling H2Os - I just love the shimmer those little pots provide! :) I then tore around the image, layered it with just a bit of yellow cardstock, then mounted it over some sheer ribbon.

I also made this card with a row of candles; the red strip across the top is covered with glass glitter so it's quite striking in person, and then I used more of that red paper as a "ruffle" under the candles. What isn't shown in this photo is the big green ink splotch created when I dropped my ink pad *right* after completing the card - at least I was able to edit it out here :)


And finally, I picked up this set of red and green magnetic frames from the $1 bin at Michael's and then made these inserts so that the inside of our front door (metal) now looks quite festive.

Check out the other cookie's creations here, and enter for a chance to win a set of your own here.

Joy to the world! The Lord has come
Let earth receive her King...

Friday, December 12, 2008

Feathery Lady

Can't believe it's been a week since I posted! I've been meaning to share this card for awhile now - the elegant lady is from In Fashion, and I just had to accent her hat with some real feathers (from Michael's). I really wanted to keep the focus on the feathers, so rather than coloring her, I simply masked the image off and stippled with twinkling H2Os. I cut a slit in the hat, then slipped the feathers in and anchored them on the back (just to be on the safe side, though, I did add a few drops of matte accents on the feathers themselves), then matted it with a black panel with the corners rounded. I tied on some ribbon, layered it onto a cuttlebugged piece, then added some pearls for the final elegant touch. On the inside, I added a white panel with the sentiment "Have a feather-fluffin' good day!" from the Feathers set.

In other smARTworks' news, our next tea party will be on Wednesday, Dec 17. Peggy has challenged us to have our focal image in an oval - pretty simple, right? Well how about playing along with us! And I've neglected to mention that Susan (the owner of smARTworks) recently released a bunch of new images - plus shipping is free on rubber-only orders this month! (all the details here). Lots of exciting stuff, I tell ya!

Friday, December 5, 2008

A Parisian Thank You

Some friends of ours spent Thanksgiving week in Paris, and brought a few little things back for us. As soon as I saw this cool Eiffel Tower, I knew I had to make a card with this Prima set (which I just had to have, but admittedly have used very little).

I started with a glimmer screen and a couple glimmer mists, just to lay down a nice sparkley backdrop... and then I just stamped away! Several of the images are done with pearlescent Brilliance ink (very noticeable on "Paris") for added shine. I stamped onto the white flowers and then accented them with a tiny rhinestone. The final touch was some sheer ribbon before mounting it onto a card base.

I don't think I spent more than 15 minutes making this card, but I had so much fun just playing with different elements... and I know that the recipients will appreciate it, too.

Wednesday, December 3, 2008

An Ornamental Tea Party

It's time for another tea party, and our hostess Dina challenged us to make a Christmas ornament. Fun!

I had a couple different ideas, but finally settled on using Silent Night and Berry Sprigs. For the main panel, I stamped onto acrylic (packaging from a cuttlebug folder - don't throw that stuff out!) with Palette ink. It looked nice, but was hard to see, so I covered the back side with white brilliance ink and heat set. Much better! Next, I stamped the berry sprigs with ivy brilliance ink. I heat set, then traced the branches with matte accents glue (Ranger), sprinkled on "dazzle dust," and accented the berries with fired brick distress stickles. OK, it's officially sparklefied :) To finish the edges, I glued a scalloped red frame to both the front and back. Next, I tied on ribbon for a hanger, then glued on a key (accented with a scrap of rick rack) and then the metal word charm (which I went over with white brilliance ink). These two items aren't just pretty - they have meaning. I chose the key because that baby boy born so long ago truly does hold the key and bring hope to all of mankind.
Be sure to check out what Susan, Dina, Giovana & Donelda have created for today's party, too. I know you'll be inspired!

Saturday, November 22, 2008

May Your Days be Merry & Bright...

I had a chance to head out to a local crop last night - but instead of scrapping, I stamped and made cards. Well, technically I only made this 1 card... but I do have several focal images ready to go now! :)

This fun little number is based on this week's Mojo sketch. I used the Merry & Bright set - the Christmas tree was the perfect size for the panel, and the sentiment fit nicely, too. I stamped the tree with black versafine, then colored with prismacolor pencils and accented the silver ornaments with a glitter pen. I used Daisy D's paper to pull it all together; I would have used ribbon for the strip across the top if I'd been at home with my stash at my disposal, but I kind of like the effect with the paper.

And finally, can you believe that Christmas is less than 5 weeks away?! As "The Most Wonderful Time of the Year" is looming large on the horizon, Dina has challenged us to make a Christmas ornament for the next Tea Party. We even have an extra week to get creative due to Thanksgiving. So if you'd like to join in the fun, have your project ready to go on December 3!

Friday, November 21, 2008

The Keys...

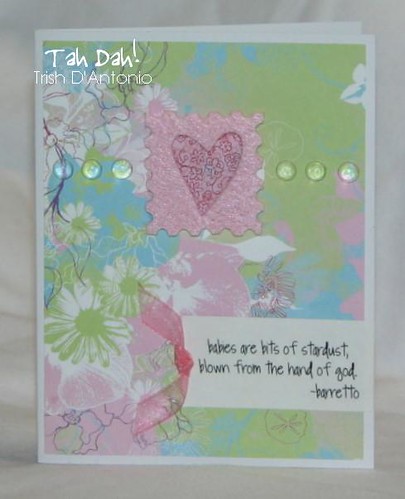
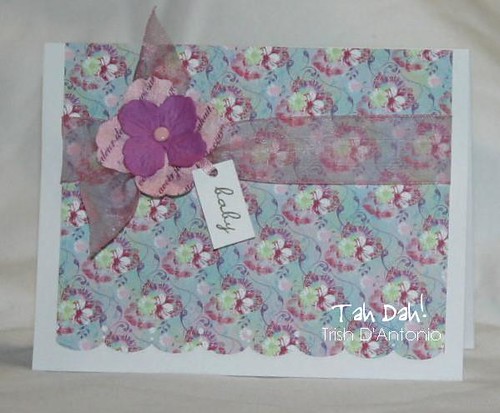
As promised, here are two more cards made with the Lock & Key set. On the top one, I stamped the keys onto the black cardstock using Brilliance ink, free cut the heart out of the funky patterned paper, embossed the keyhole then cut out the center. Nothing too crazy, but kind of a fun vibe to it.

The second card is made from acetate, which is always difficult to photograph. I stamped the keys across the front using Stazon ink, then attached the main key tag and sentiment panel with double stick tape, then sewed the beige panel onto the inside of the front cover (which hides the ugly backside of the adhered pieces, but still allows the keys to be seen on the front. Very cool!

Hope to be back with another post tomorrow if time allows :)

Tuesday, November 18, 2008

Fun with fleur-de-lis

I'm always drawn to the fleur-de-lis symbol; I know it has been used to represent many things (check out a brief history here) but I just like the vintage, elegant feel of it. This one in particular is from the Lock & Key set.

On this first card, I started by stamping the image repeatedly onto plain ol' white copy paper then clear embossing. I spritzed it with glimmer mists (pink taffy, honey dew, and patina) and blotted off the excess. I know you can't really tell from the picture, but it has a beautiful sheen in person. Mat it with white, add a simple "thanks" (Combo Sentiments), attach some hardware and ribbon, then glue it all to a pre-made card and you're good to go!

I decided to take a simple, almost severe approach on this card, and I think it would be a great birthday card for a guy - and absolutely perfect if he happened to be a boy scout :) I stamped onto some embroidery fabric with brilliance ink, then mounted it to black cardstock with brads, then added some brown cardstock before attaching to a green card base. Super simple, but quite elegant.

I'll be back later this week with a couple ideas for the other images in the set!

Friday, November 14, 2008

An Unusual Birthday Card


We'll be attending a little party tomorrow, and we've purchased a variety of dress-up items for the darling birthday girl. As I was deciding what to do for her birthday card, though, my mind kept going back to focusing on why she is truly a princess... and this rather unusual birthday card is the final result.

I started by stamping the crown (smARTworks Kings) onto an oval die cut, then outlined it with a spica glitter pen and blinged it out with rhinestones. I mounted that onto a scalloped die cut and decided to just leave it at that. I stamped the verse (Clear Dollar Stamps) below with gray versafine. I love the verse, but will admit that the fine font is a wee bit difficult to read. For the inside, I stamped "Happy Birthday" (Stampington) and then the word Princess (JustRite block & Brayton font) accented with stickles.

I can't think of a better reason to celebrate!

"Before I formed you in the womb I knew you, before you were born I set you apart" Jeremiah 1:5a

Wednesday, November 12, 2008

Getting around to another tea party...

As I mentioned in my last post, Donelda is our hostess for this smART Cookie Tea Party, and she challenged us to incorporate a circle in some form or fashion.

My card is quite simple, but I incorporated a circle and I actually used something from my embarrassingly large embellishment stash. Double points! :) I started by stamping the super-cute Mama Teddy (Teddy Gals) and then added color with prismacolor pencils. I trimmed the panel down, and matted it with blue (accented with the fancy corner punch). I stamped screen onto some light blue cardstock, and then layered that onto the gray card base. I tied on the yellow ribbon, and then added the circular charm with the word "adore" (from Making Memories), then mounted the main part with foam dots so it has a bit more dimension.

All the other cookies will be posting their creations throughout the day - click over to Susan, Dina, Giovana & Donelda to see how they got circular.

Friday, November 7, 2008

Sparkly Teddy Bear


A simple but fun card to share today, featuring a glitter window. If you've never made one, you really should - they're easy, and always guaranteed to impress. You can find a good step-by-step tutorial here.

Anyway, this card features the Teddy Gals set. I used the flower image on the front of the card, and then punched the circle. I then laid that on a white card base and carefully punched another circle. Next, I traced the circle onto the inside of the card (very lightly), then stamped the teddy using my trusty stamp-a-ma-jig, so that she'd be featured nicely in the opening. The SAMJ made it easy to position the greeting on the opposite side, too (from Semi Say #2). I tied ribbon onto the red panel before doing the glitter window, then glued everything together. The process was a bit more meticulous than my normal "fly by the seat of your pants" routine, but nothing too difficult - and it's very cute, if I do say so myself!

So did you notice the circular window? Well, that's also a good lead-in to tell you about the next Tea Party on November 12. Donelda has challenged us to incorporate a circular element - the card itself can be a circle, or it can have circular images or embellishments, or you can even use punches :) We'd love to have you join in the fun, so hopefully you can find some time to get circular.

Friday, October 31, 2008

Halloween Treats

Our family doesn't really do much for Halloween - we focus more on the fall/harvest aspect (plus that way all the decor carries over into Thanksgiving!). We do take the kids out trick-or-treating in our neighborhood; this year we have a knight in shining armor and a very elegant princess!

Anyway, our son's school is having a Halloween parade (all the kids march around the school) and then a little party this afternoon, and I wanted to make something for him to share with his classmates. I headed to Michael's and the Dollar store, and then made up these little goodie bags with a pencil, stickers, kazoo, balloon, and some candy. I had to incorporate some stamping in there somewhere, so I made little tags (pumpkin stamp from Target $1 bin, enjoy from Hero Arts) that I just stapled on.

$7 in supplies + 1 hour of stamping/assembly time = 24 Bags o' fun!

Wednesday, October 29, 2008

An Inspiring Tea Party

Well, as I'd mentioned last week, it's my turn to host the smART Cookies' Tea Party, and I chose to "inspire" everyone with this photo from Traditional Home. It's always fun to see what individual elements each person chooses to work with!


I decided to go with colors: white, black, slate gray, and soft teal. After playing around with a couple stamp sets, I finally settled on In Fashion. I started by stamping the very stylish lady in black versafine, and added just a touch of colors with my prismacolor pencils (there's actually a bit in her hair and on her cheeks as well). I wanted to use a black card base, but it looked a bit too stark, so I laid a swirly glimmer screen over it and then misted it with silver glimmer mist. Perfect! I then added a band of the soft teal cardstock, accented with a Martha Stewart edge punch and wrapped with ribbon. I stamped the sentiment on a scrap of white, then matted it onto slate gray and added rhinestone accents at each corner. The final touch was a couple prima flowers on the main panel, just to provide some balance...

Would you like to see what the other designers have created? Well, go visit Susan, Dina, Giovana & Donelda to see how they interpreted the photo.

Sunday, October 26, 2008

Wanna win some stamps?

Well then head over to Susan's blog! She's the owner of smARTworks and will be giving gifts this year: stamps!

So why are you still here?!? :)

Saturday, October 25, 2008

The Lord is God...

Still haven't had much time for creative pursuits, but I did manage to pull this card together. It all started with this week's sketch from Card Positioning Systems, and then the papers from Memory Box. I've had this MB paper kicking around for awhile now; I love the designs, but they all have rather strong images and I've had a tough time actually incorporating them into a card... this time, though, I started with the paper. The verse (Uptown Designs) is the only stamped element. I also highlighted the trees and the word "God" with a spica glitter pen, but just couldn't get a decent photo. Trust me, though, it's quite lovely in person! I just love the subtle sparkle the pens provide, plus the ease of application.

Well, I'm off and running again. Hope to be back soon!

Wednesday, October 22, 2008

Tea Party Challenge

My turn to host the smART Cookie Tea Party, and I decided to go with an Inspiration Challenge. As much as I'd love to say this is a photo of our living room, it's actually from the Traditional Home site. So if you're now feeling inspired by the colors or other elements in the room, then why not play along with us? Party will be held next Wednesday, Oct 29. Hope to see you there!

Sunday, October 19, 2008

Time for a makeover!

So what do you think? Tekeme Studios set up me up with this fabulous redesign... now if only *I* looked as good as my blog! :)

Friday, October 17, 2008

Hoot!

The most recent smART Cookie challenge was to create something using the Hoot set. I know I've seen lots of owl sets lately, but most are more "cutesy," whereas this one is very realistic. I chose a very simple layout for the card, letting the detail of the image sort of speak for itself. I stamped it with black versafine onto brown cardstock, then embossed with Faith's Transcendence powder. I added just a bit of color to the branch and with prismacolor pencils, and then brushed over the moon with silver twinkling H2Os. It might be a stark card, but it can still use some shimmer! I layered it with some black (accented with a line of piercing), then made a simple tent card base.


Head over to Susan's blog to see what the other cookies created and for a chance to win a set of your own!

Thursday, October 16, 2008

Simple Thanks

I wanted to send a card to a friend, and nothing I had felt quite right, so I forced myself to create something... OK, so maybe I just wanted an excuse to play with some new goodies :)

The very cute little heart tree/bouquet thingee is from Autumn Leaves stampology and I accented it with ivory flower soft. I used matte accents (Ranger) to adhere it, and it seemed to work pretty well. I ordered this stuff, not quite sure what to expect, but I love it! It's sort of plastic-y but very soft - hard to describe, but definitely fun to play with. I guarantee you'll be seeing more of this in the future :) The paper is SEI Winston, edged with a (new) Martha Stewart border punch, and the sentiment is Impression Obsession. Now off to actually get this card in the mail!

I'll be back tomorrow to share my card from the smART Cookie challenge, featuring the set Hoot!

Wednesday, October 15, 2008

Time for another party!

Today is another smART Cookie Tea Party, and our hostess Susan provided a sketch with a "cut out" element. Man, my cutter bees have really been getting a workout lately! :)

After all the baby cards I've been making, I wanted to use some different tones... and well, this is definitely different! The card actually isn't quite so bright IRL, but my camera just didn't know what to make of these colors. All the papers are from the BasicGrey Cupcake 6x6 pad, and I used Express Duo #1 and Deut 6:5. I modified the sketch a bit to accommodate the large verse, and I really wanted to use ribbon across the bottom, but I couldn't find anything in my stash to coordinate, so I just used a strip of paper. I stamped the verse onto a piece of white, then accented each "all" with a swipe of twinkling H2Os, then cut them out. Final touch was three dew drops along the edge for a bit of dimension.

Would you like to see what the other team members have created? Then click over to Susan, Dina, Giovana & Donelda. We'd love to have you join in - just leave a comment with a link to your creation!

Saturday, October 11, 2008

Two more baby cards

bg3bg4
I really hope these are the last "baby girl" cards I need to make for awhile - I'm getting sick of pink! :)

Both these cards were made with the same pad of BasicGrey Euphoria paper that I've been using for the past couple weeks. I love the colors - soft yet bright, and lots of blues and greens to break up the pinks & purples.

This one on the left also uses a felt heart frame (Fancy Pants) along with some acrylic pieces (Michael's). The sentiment was computer generated. For the card on the right, I just grabbed some ribbon from my stash, prima flowers (the bottom one was spritzed with pink taffy glimmer mist to pull the colors together), then stamped the word (SU Noteworthy) onto a scrap, then tied it in with the flowers. The bottom was done with a Martha Stewart border punch.

Very little stamping involved, but it still felt great to play with paper and glue!

Friday, October 10, 2008

Upcoming Tea Party


I know I still haven't been posting much; hoping to get some time to stamp this weekend. In the meantime, though, I wanted to share the challenge that has been served up for the next smART Cookies' Tea Party. Susan is our hostess this time around, and she's provided this sketch; we can use any cut-out image as the accent (shown by the circle). We'd love to have you play along with us on the 15th!


Monday, October 6, 2008

Enjoy today - and a BIG sale!!


I have two more cards to share featuring the Borders & Seals set, both simple but elegant.


For this first one, I started by lightly drawing a grid on the white cardstock so I could make sure that the images were stamped evenly. The sentiment is from Sunflowers, and it's layered with white organdy ribbon and two pearls.


For this card, I stamped the long image from the set onto taupe cardstock with versamagic ink, used sticky EP, heated, and then applied gold leaf foil. I matted the strip with black, and then adhered it to the card, where I had stamped selas along the bottom edge. The sentiment is from Bleeding Heart, and I split it using my stamp-a-ma-jig.

So would you like to purchase any of these sets for yourself? Well, head on over to smARTworks ~ it's birthday month, and all in-stock rubber is 35% off!! Order $50 or more of stamps only, and shipping is free; if your order includes accessories, then shipping is half off. Get all the details here. What better way to kick off the week than ordering new stamps! :)

Wednesday, October 1, 2008

Tea Party!

It's Tea Party time again, and Peggy Lamb was our hostess this week. She provided a sketch, which was to feature paper piecing on the main image. Can I let you in on a secret? I really don't like paper piecing - I get impatient with the detailed cutting (as is the case with anything that's overly involved, which is why most of my cards are relatively quick to recreate :) But I must admit that I really like the way this card turned out, and the extra four minutes of work was definitely worthwhile!

For the main image, I chose this adorable bear from Teddy Gals, and used the scraps (BasicGrey Euphoria)from the baby card I made last week on her dress and hairbow. I also unearthed a scrap of silver metallic paper for the watering can. I colored the body with prismacolor pencils, the sleeves of the dress with gel pen, and the flower with twinkling H2Os. The sentiment is from Bloomin.

Would you like to see what the other team members have created? You can see Peggy's card at Susan's blog, and Dina, Giovana & Donelda will be posting their cards, too. We'd love to have you join in - just leave a comment with link to your creation!

Tuesday, September 30, 2008

Welcome Baby


Well, I just got word that yet another friend has given birth - that's 4 baby girls in the past week! Obviously, another card was called for, and this time I pulled out my Borders & Seals set. I chose to use pale pink & yellow ink to make the design on the base, added a strip of cardstock on the bottom (to cover one of my screw-ups :), then tied on ribbon and the adorable charm. "Welcome" is from the combo sentiments set.


As I was photographing the card, it reminded me that I'd never posted the other cards I made with this set... I used the same technique for this blue card as with my baby version. In fact, wouldn't this be cute for a baby boy? On this one, I accented the panel with a strip of white (accented with a cuttlebug embossing border). I stamped the sentiment (Middie Messages #2) onto a metal accent (Making Memories) with Stazon ink, then tied on a bit of ribbon to soften it.

Well, that's all for now. See you tomorrow for the Tea Party!

Saturday, September 27, 2008

Another simple birthday card

We have a birthday party to attend tomorrow, and I made this simple card for the adorable little birthday girl. I created the candle from paper scraps - the stripes were added with twinkling H2Os, and there's glass glitter on the flame. Add some BasicGrey paper and a die-cut word (Cuttlebug) and it's all done...

In other party news, it's time for another smART Cookies Tea Party! Peggy provided the sketch this time, and she even took it up a notch and challenged us to do some paper piecing. We'd love to have you join in the fun - the party will be Oct 1, so get cracking on your card :)


Friday, September 26, 2008

True Beauty

Life continues to be busy at our house; I was supposed to go to a crop this evening and I was eagerly anticipating some cardmaking time. Plans changed so I wasn't able to head out, but I still managed to get some stamping in here at home. Bliss!

I based this card on Taylor's sketch, but did take some liberties to accommodate the central image. The woman is from Chapel Road Artstamps; they offer some very nice images, but I was disappointed by how thin the rubber was. I think I need to go with lighter tones next time I stamp this lovely lady, as I'm afraid she came out looking a bit scary here :) The verse is from Clear Dollar Stamps. The patterned paper is BasicGrey, and there are tiny red dots in it, which is why I chose that as my accent color. The ribbon is from amuse, and it's a wonderful weight to work with - easy to tie and holds its shape well.

Well, enough jabber for now. Off to bed so I hopefully won't be a grouch tomorrow!

Friday, September 19, 2008

Getting pinky with it

I have no idea where that title came from, but that should provide some pretty good insight into my current mood :) Things have been a bit nutso these past couple weeks, but I took some time to create this morning - trust me, I needed the therapy!

I have a couple friends who are expecting, and I know at least 2 of them will be welcoming little girls. I used this week's Mojo sketch as my starting point, pulled out some BasicGrey paper (Euphoria collection) and this card is the final result. I love to use this verse for baby cards, and the font on this stamp (Whipper Snapper) is particularly fun. The final touch was some layered primas, topped with a pink rhinestone.


I wanted to make another card, and I was dying to use these beautiful Christine Adolph papers. They're 12x12, but most have strips or panels so can be easily cut down to card size. The background paper is foiled, so is absolutely stunning IRL. I accented it with a small strip of ledger type paper (wiped down with old paper distress ink), then tied on some organdy ribobn for the finishing touch. The inside reads "May your day be steeped in joy and warmed by love." (smARTworks) Very simple, but I love the elegant result.

Well, therapy time is over - have a wonderful weekend!!

Wednesday, September 17, 2008

Another Tea Party!

So here we are again with another smART Cookie Tea Party! As mentioned in my last post, Giovana provided this lovely inspiration piece. Somehow in my mind, these bright flowers translated to a fallish card (I'm blaming it all on the orange!)

So here's my little creation, made with smARTworks' Wave Good-bye and the flourish from Stella. I started by misting some white cardstock with a couple colors of glimmer mist, then I stamped the sentiment. I trimmed that down, then took the excess cardstock and layered on a few more colors; I then stamped the leaves onto that and trimmed them. For the orange panel, I stamped the flourish along the side and bottom of the orange panel, then added the sentiment and placed the three leaves. I love it when a card goes together this quickly!

Susan, Dina and Giovana will be posting their creations throughout the day, and we'd love to have you play along as well. Just leave a comment so we can check it out! And if you upload to SCS, please use keyword SCPT2.

Saturday, September 13, 2008

Simple Kid Birthday

I can't believe it's been so long since I last posted! Having a kid in school has definitely meant some adjustments for our family; I think we're pretty much in the groove now, and hopefully that will mean more stamping time for me soon :)

We have a party to attend this afternoon, so I made this quick card for the birthday boy. The only stamping is the sentiment (Clear Dollar Stamps) - everything else is just punched, cut, or embossed. I accented the 4 with some chalk that has just a bit of shimmer to it, so it's cool without being over-the-top.

Hope to be back soon! I'll definitely be sharing a card on Wednesday at the next Tea Party. Giovana has posted a gorgeous inspiration piece - check it out!

Wednesday, September 3, 2008

Tea Party!

I'm so happy that the smART Cookies' Tea Party has started back up again, and Dina provided a sketch for the first party. My card is pretty simple, as our son just started kindergarten yesterday; our daughter is really missing her playmate, so she's requiring extra mommy time.

I created this card using the Keepsakes set, plus the script from One Smile on the background panel. I had a hard time getting a good photo of this card, and finally just had to accept that this was as good as it was gonna get :) The buttons along the side are stamped with pearlescent crimson brilliance ink, embossed with Faith's Transcendence ep, then lightly spritzed with suede glimmer mist. I also used glimmer mist on the background panel so it wasn't so obnoxiously white.


Susan, Dina and Giovana will be posting their creations throughout the day, and we'd love to have you play along as well. Just leave a comment so we can check it out! And if you upload to SCS, please use keyword SCPT1.

Have a great day!

Thursday, August 28, 2008

Recommended Reading :)

First off, have you ever had questions about proper etiquette when using monograms? Well, the JustRite team lays out all the guidelines here.

If you have a Big Shot/Kick, Cuttlebug, or pretty much any die cutter, then you need to hop over to Indigo Inklings. Tons of information, such as avoiding extra lines on your cardstock with the cuttlebug embossing borders, and she also provides lots of photos for clarification. Look for the tutorial box on the right hand menu bar.

I've had the link to Stamphenge on my sidebar for awhile, and due to some server issues it's recently moved. Lots of goodies on the site, including everything you ever wanted to know about minibooks. To celebrate the move, she'll be hosting three giveaways. Check it out!


And last but not least, I want to make sure you know about http://blogsearch.google.com/ Whether you're looking for a challenge to participate in, product reviews, or projects done with a particular stamp line, blog search is a fabulous tool!

Wednesday, August 27, 2008

Thankful for You

Quick card to share today, this time featuring Hands Collage. I simply stamped it, colored the hands with prismacolor pencils, then went over the background with a marker. I layered it with some brown (punched with a Martha Stewart border) and accented it with three wooden beads. The sentiment is from the Thankful set; there are so many great sayings in that one! A very easy card to just let someone know that you appreciate their friendship...

Also wanted to let you know that Dina has posted the layout for next week's Tea Party - get all the details here. We'd love to have you join in the fun!

Monday, August 25, 2008

A few more challenges

Two more cards to share from Virtual Stamp Night at SCS this weekend. This one was for the "Fancy Nancy" challenge, and as soon as I read the description, this stamp came to mind. It's from a Prima set that I purchased earlier this year, but had yet to actually use. I stamped it then traced it with stardust stickles (not that you can really tell from the photo!). I layered it with a bit of 7gypies paper, and then mounted it onto a card base that I'd lightly spritzed with pink taffy glimmer mist. The final touch was the sentiment (Stampington), and I think this would be a great "Thanks for your hospitality" card.


This card was for the purple challenge. I pulled out some retired SU Vintage Violet, as I wanted to make a card for a friend and all my other purples just seemed a bit too bright. I embossed the panel using the folder from the Friends Forever die/emb set. I just swiped it with white ink, then added the sentiment (Melissa Frances). Tie on some ribbon, glue it down, and all done... I honestly think this might be the quickest card I've ever made!