Saturday, June 28, 2008
Silver Wedding
I started by stamping the filigree background onto white cardstock with silver brilliance ink. I also stamped the sentiment onto a scrap of white. I then layered it all onto sparkley silver paper, and added some sheer white ribbon and clear acrylic dots. Super simple, but definitely elegant.
Now I need to go get myself ready...
Friday, June 27, 2008
Happy Anniversary
I made the card based on Mercy's Tuesday sketch, and I pulled the colors from the gorgeous flower (which I received as a RAK quite some time ago, but just recently rediscovered). I paired it up with some BasicGrey Sultry paper, and the sentiment is SU (Hugs & Wishes). I did make one happy little discovery today: I was trying to figure out what to do for the center of the flower when I noticed a scrap of paper that had been embossed with the CB bloom dots folder. Hmmm... wonder if I have a punch that would fit one of those circles? Yep, the 3/4 circle punch is a perfect fit! I punched it, accented the embossing with some metallic rub, then attached it to the flower with a mini brad. I love this look, and I definitely want to play around with it more.
'Nuff chat, I'm off and running again!
Thursday, June 26, 2008
The Heart of a Home
I pulled out my Home set and came up with this. I stamped the image onto white paper, colored with prismacolor pencils, then covered with strong adhesive (that red liner tape stuff, except sold by the sheet) and then sugar beads. I love that look, but just don't pull out my beads that often because I'm always afraid I'm going to make a big mess :) I used Bazzill cardstock for the base and the accent band; I used a Martha Stewart punch on that, and was pleased that it went through the Bazzill so well.
All righty, I have to get back to work now. Hopefully I'll be back Monday with reports that I sold everything (hee hee!)
Wednesday, June 18, 2008
Our last tea party!
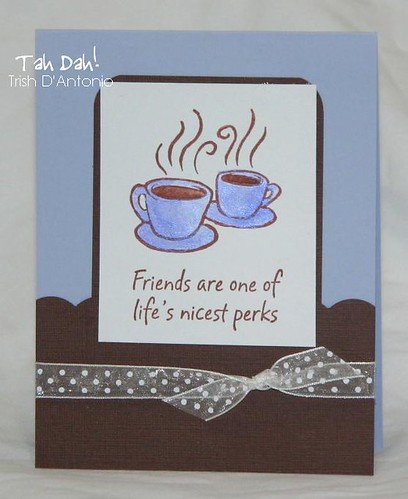
I pulled out my Coffee Time set and started playing around. I ended up masking the larger cup, then stamping the small cup off to the side - that looks friendly, right? I painted the cups with Twinkling H2Os for the sparkle factor (I challenged myself NOT to use glimmer mist on this card, LOL!); I chose to use a bluish lavender as my accent color, and even attempted to do just a bit of shading on the cups. I then added the sentiment, trimmed it down and matted it (with the corners on the mat rounded). I added a brown panel across the bottom with the top edge scalloped (using my corner rounder punch), and then tied on some dotted ribbon (May Arts). Quite simple, but sometimes it's nice to take a break from patterned papers and embellishments... (BTW, the pic is much clearer if you click on it)
Check out what the other smART cookies have created for today's party: In the Works, Mama Dini's Stamperia, Dee's Studio, & Sweet Somethings! (And I heard a rumor that there might be some free rubber up for grabs somewhere...)
Tuesday, June 17, 2008
Butterfly Faith
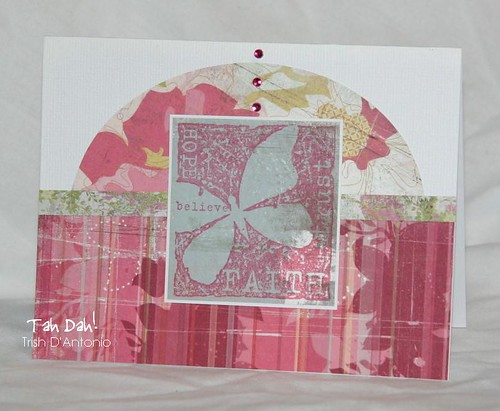
I ended up pulling out an old SU set (Nature's Secret) and pairing it with BasicGrey Phoebe paper. Our friend is fighting breast cancer, so the pinks in this paper seemed appropriate. I did deviate from the sketch just a bit, altering it to fit a standard notecard (I didn't want to worry about extra postage). I'm happy with the results, and I know it will be an encouragement to our friend, too.
Monday, June 16, 2008
Whatever...
I couldn't do anything with the photo besides crop it, but here's a card to share regardless :) One of our friends' daughter's just graduated and turned 18 - definitely reason for celebration! She's a wonderful young lady, and I know that the Lord has great things in store for her. I wanted to make her a "cool" card and avoid anything overly girly, so this is what I came up with. "Whatever" and the verse are from Clear Dollar Stamps. I paired it up with some BasicGrey paper which I then gussied up with BG stamps (I also stamped a few of these on the envelope). I blinged it up with some light green rhinestones, and pronounced it good.
I don't know how much stamping I'll be able to do these next 2 weeks; I'm having another big sell-off of stamps, paper, etc. later this month and I still have more sorting to do to get ready for that. If you're anywhere in the Philly area, email me for more info -- I seriously am going to be running my own LSS for a couple days :)
Saturday, June 14, 2008
Feathery Fun
So would you like to see what the others have created? Cruise over to In the Works to see the gallery... And be sure to leave a comment for a chance at winning a set for yourself!
Friday, June 13, 2008
For My Hubby
Thursday, June 12, 2008
Pushing Daisies
I love the way these look in the bright colors - I was just playing around with a variety of palette, versamagic, and brilliance inks when I created these. And I must admit that the funkified alignment was a direct result of my TV distraction... I wasn't paying close enough attention to the orientation of my block in relation to the stamp-a-ma-jig, and I ended up "misplacing" the 2nd layer on the middle flower. But I thought it looked kinda neat, so I went with it! And yes, there is glimmer mist spritzed on the main panel - I love that stuff!
This second card is much softer. I used a cream panel, and built the flowers up with only two layers (white and wheat versamagic). I then added the yellow center, and it was done. BTW, I only used my stamp-a-ma-jig to make sure that the flower layers were occupying the same space, but I didn't align each petal; I still think they look lovely! I finished it off with the verse (Hebrews 13:15), matted and corner punched, then layered on some sheer white ribbon.
Wednesday, June 11, 2008
Blessed Father's Day
Medallions
I stamped the seal images on ivory paper, then trimmed them. I punched circles from the DCWV Luxury Stack to mat them, then layered them onto another print from the same stack. The papers are pearlized, so they're really lovely in person. I added a brad in the center of each, and then added a lace ruffle on the side - how fun is that? I used ivory cardstock for the base, but it looked a bit too plain so I pulled out my glimmer screens to add a bit of pattern. I used honeydew & latte gm's (spritzed well above the actual paper to avoid "blobs" and create a very fine mist). I stamped the sentiment, and it was done.
I know I've been unusually quiet these past couple days; i just needed to get caught up on some things around here, plus it's been really stinkin' hot so the kids and I have been spending quite a bit of time outside in our little pool. I did get some other panels stamped last night (while watching Deadliest Catch) so hopefully I can get those made into full cards later this afternoon. Later!
Thursday, June 5, 2008
The Melody of Life
As I was photographing the card, my 5 YO commented that the girl's hair looked kinda funny; I then told him that this was how ladies used to wear their hair a long time ago. He then wanted to know if I used to have mine that. Gotta love kids and their questions! (BTW, the answer is no!! :)
Wednesday, June 4, 2008
Tea & Cookies
This first card is quite small - only 3x5 but I love how it really showcases the verse (Deut 6:5). I matted it with black, and ended up accidentally punching the entire thing with my corner rounder (loooong story) - funny thing is that I actually liked how it looked so I went ahead and did the other 3 :) I stamped the flower (Sunflowers) onto cranberry cardstock, and trimmed it down to a nice accent piece. I spritzed the card base with glimmer mist just to add some interest, then just glued everything down. Very simple!
I also needed to make a card for a little birthday party we attended this morning - the kids' friend is turning 4, and I happen to know he really likes bright colors so I decided to go ahead and make his card using orange and green - he's also really into bugs right now. I started by stamping "Happy Birthday" (Cake Time) onto a piece of orange cardstock, then I placed a 4 (Heidi Swapp mask) over it and misted it down with 2 colors of glimmer mist. Very cool effect! After it had dried, I trimmed it down to a tag shape then stapled on just a bit of rick rack. I stamped the bee (Winging It) onto some BasicGrey paper (I'm pretty sure it was from the Cupcake pad), and then trimmed another scrap of orange cardstock with some decorative edge scissors just to add another punch of color. I stamped the sentiment on the card base, and it was done! Definitely not your stereotypical boy card, but he really liked it.
Monday, June 2, 2008
Happy Mail Day
Well, back in March, Denise at All Things Stamped hosted a "Spring Fever" challenge, and I ended up winning a little prize. I was thinking I'd probably get a nice assortment of embellishments or something... but guess what just showed up in my mailbox?!?
So yeah, I'm definitely jumping on the monogram bandwagon now! :) Thanks so much, Denise!